Built-In Floating Desk with Closet Rods
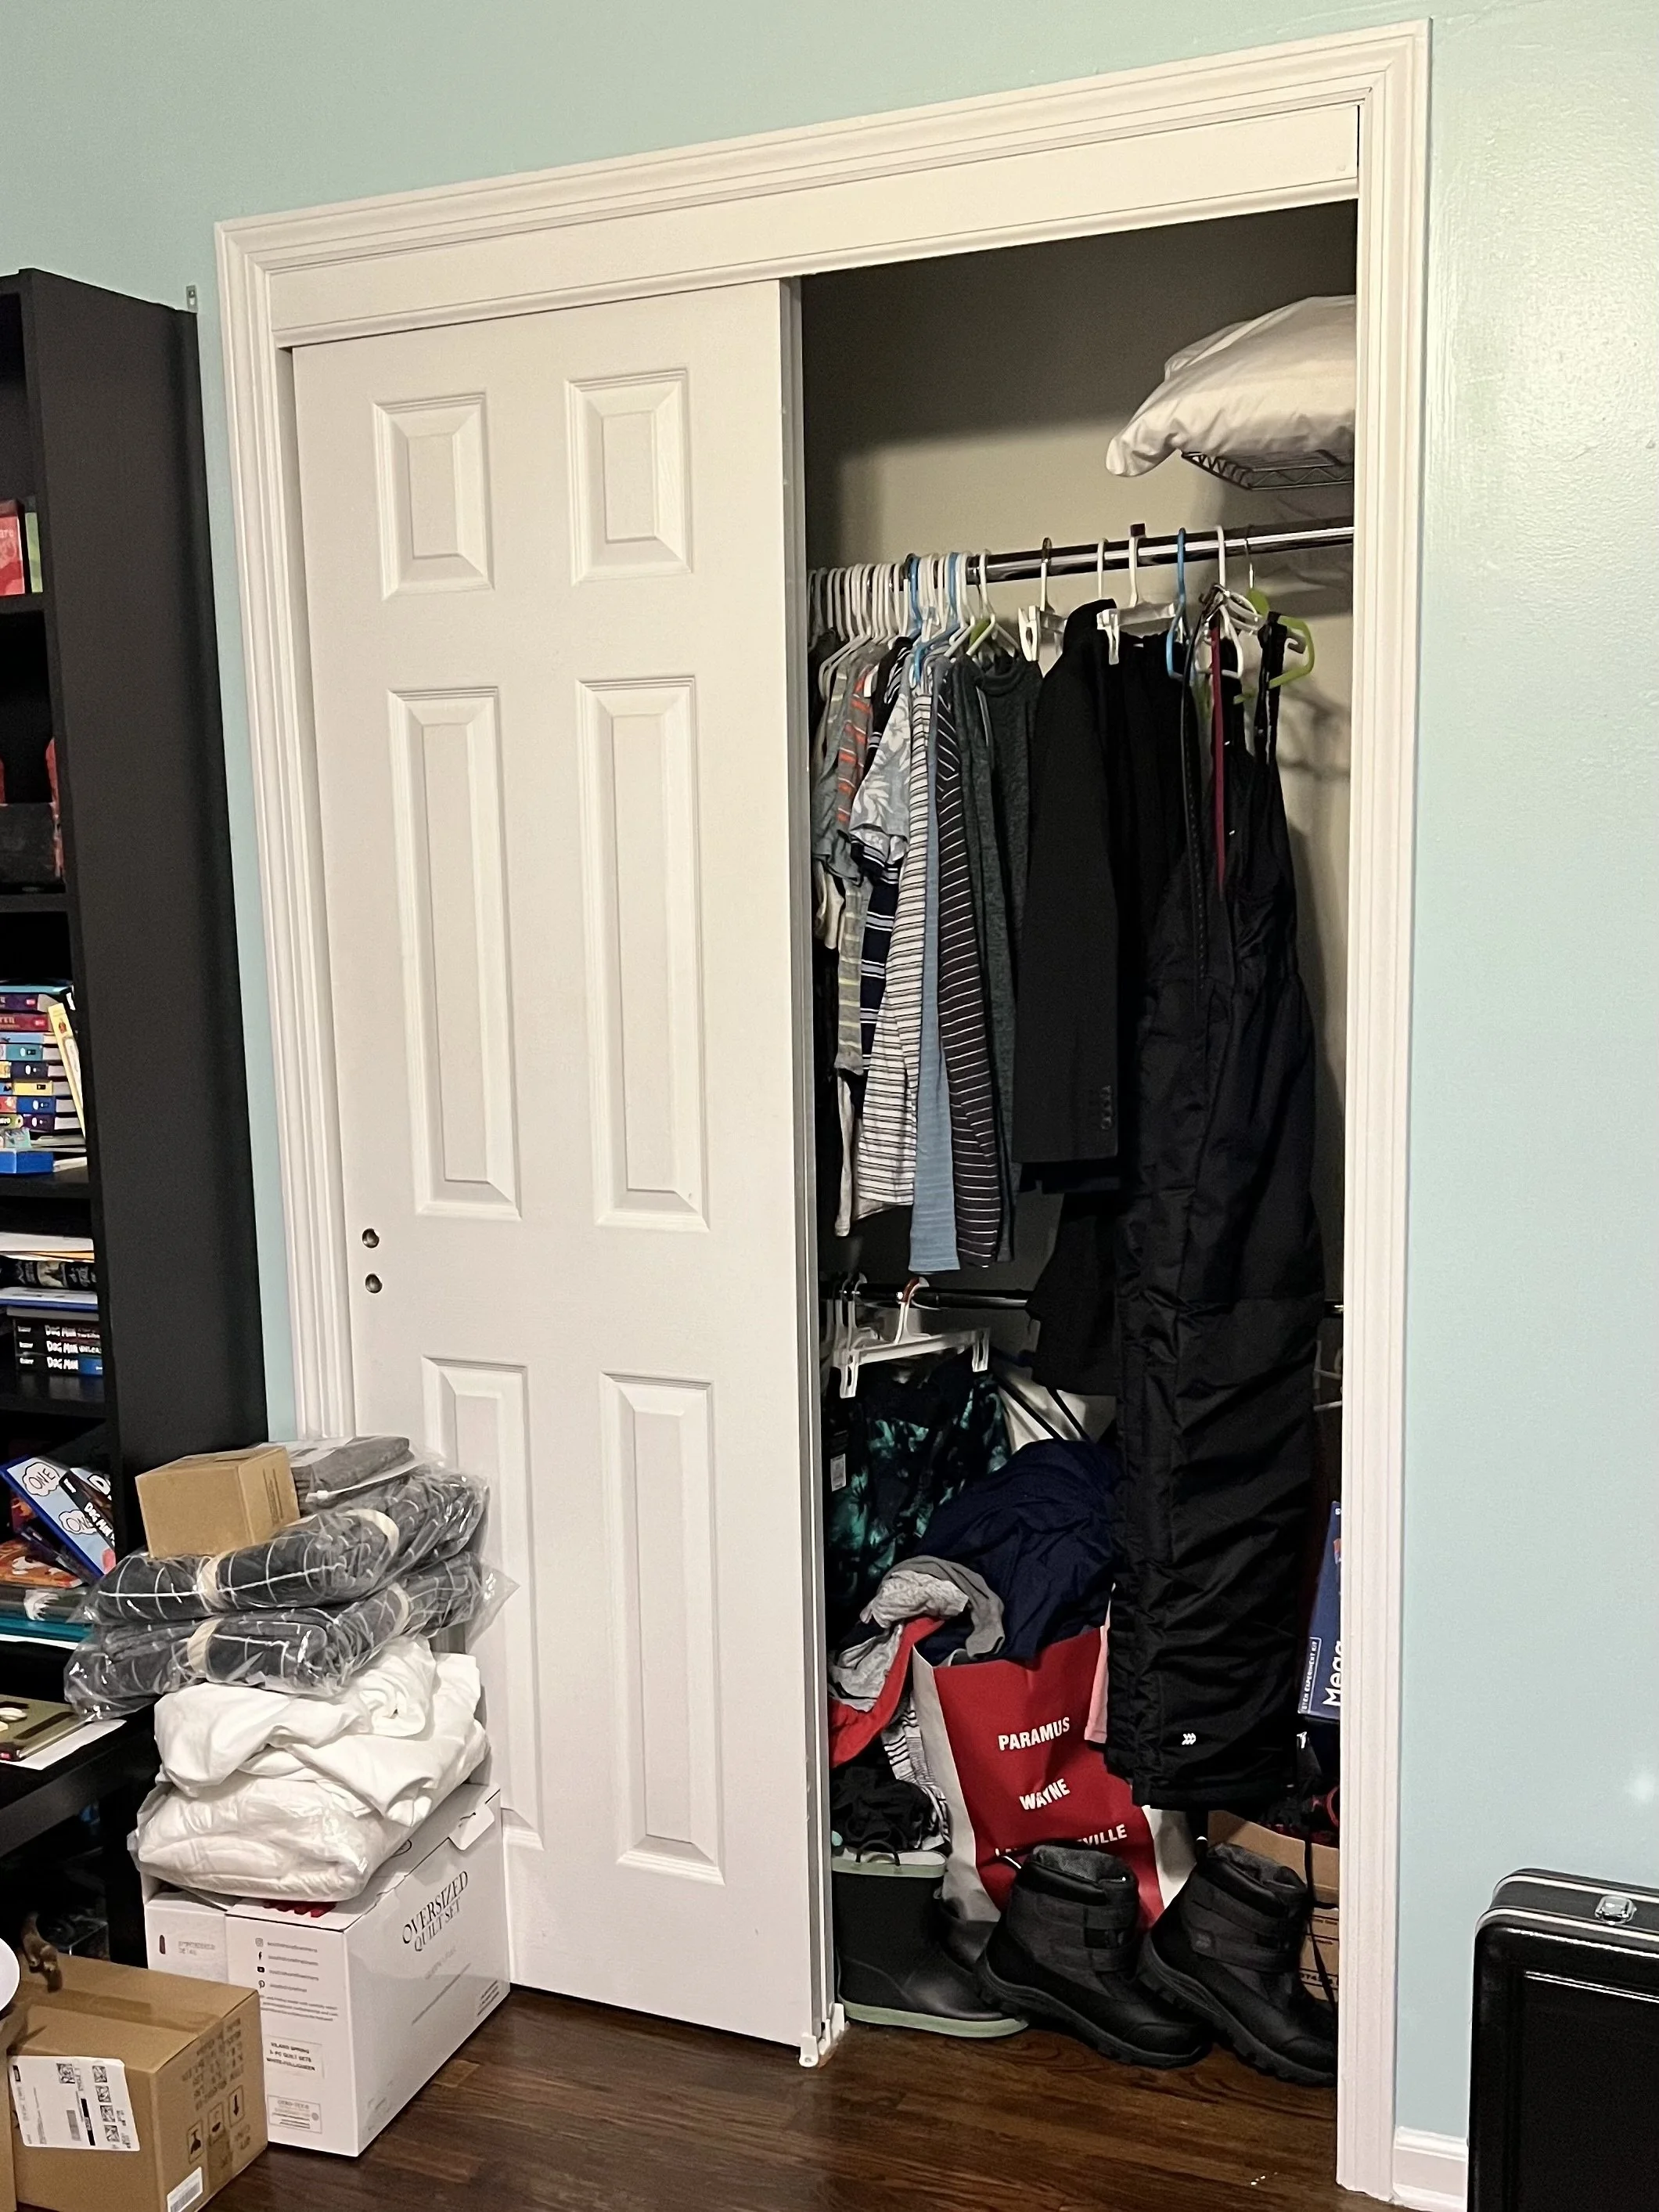
The first time I did this type of build where I converted a closet into a desk space was for my son, who needed a dedicated spot for his desktop computer. While he mostly uses a dresser for clothes and doesn’t have a ton that needs to hang, this is his only closet, so I still wanted to keep some hanging space available.
Fortunately, the sides of his closet were deep enough to accommodate some clothing storage. I used that space to install closet rods on either side, making the setup dual-purpose- a functional desk in the center, and (somewhat) hidden clothes storage on the sides.
This build is very similar to the version with floating shelves, so you can click here to read through that tutorial first and view the full list of tools and materials. Then, follow the alternate steps below to modify the build for closet poles instead of shelving if that layout fits your space better.
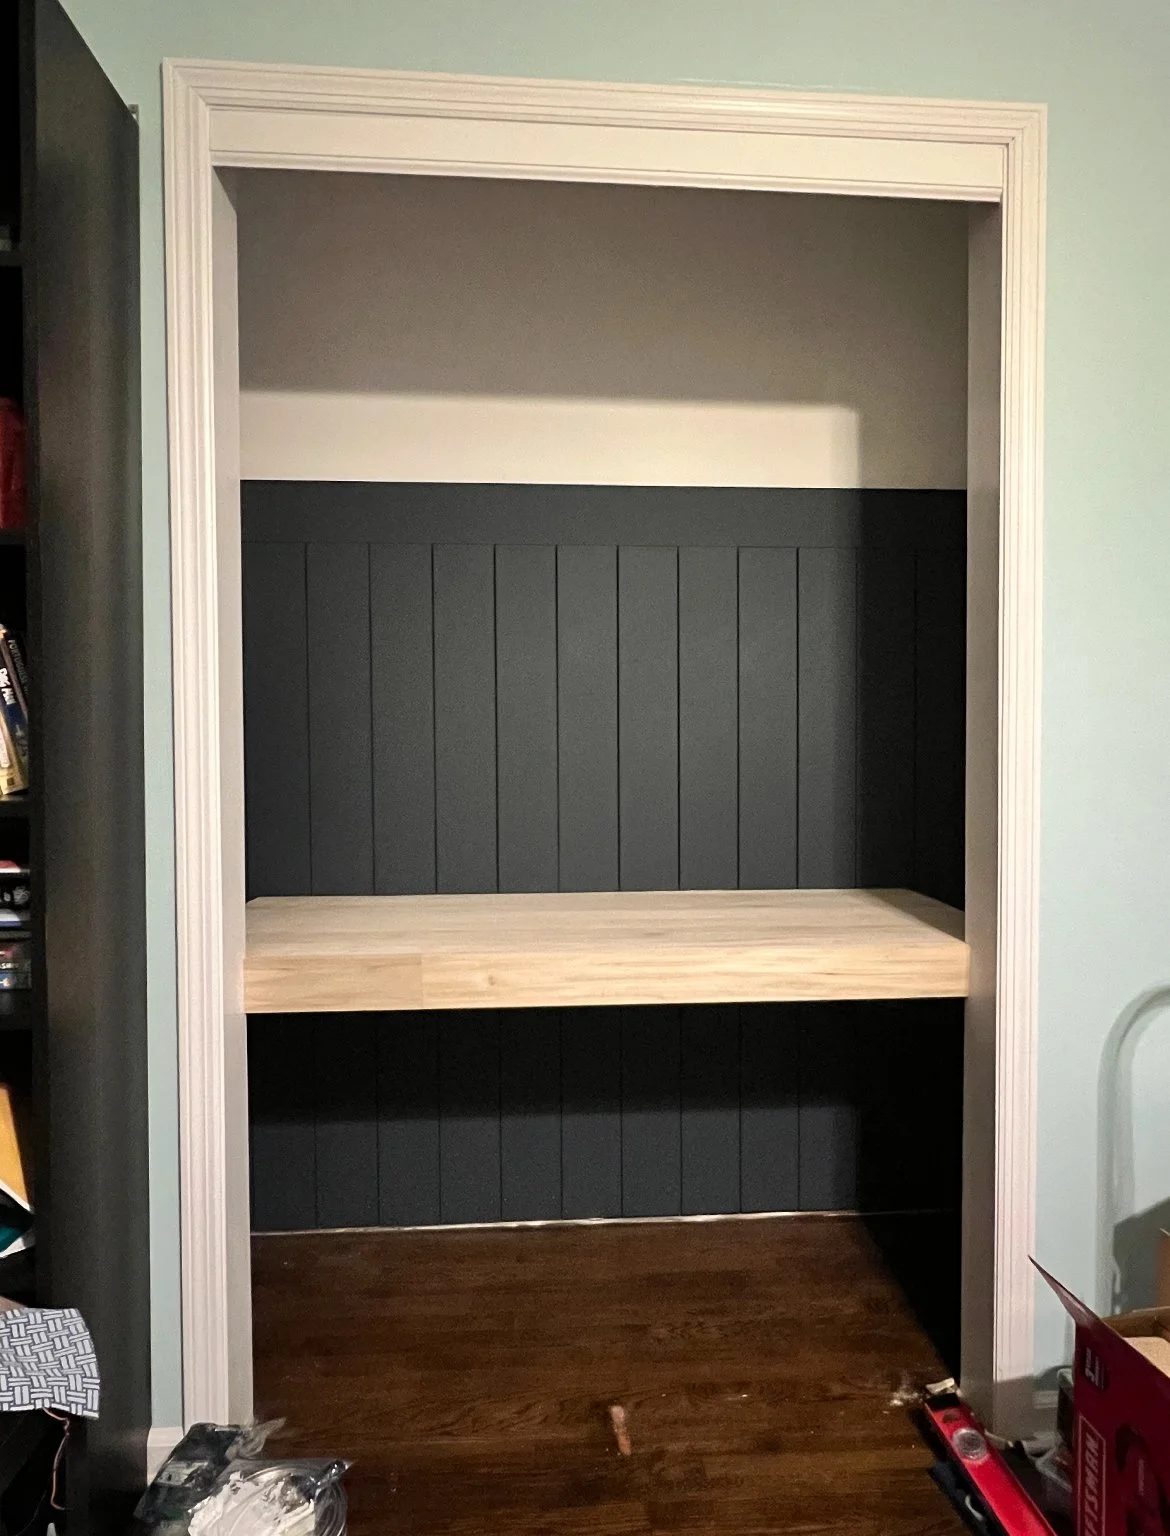
Before
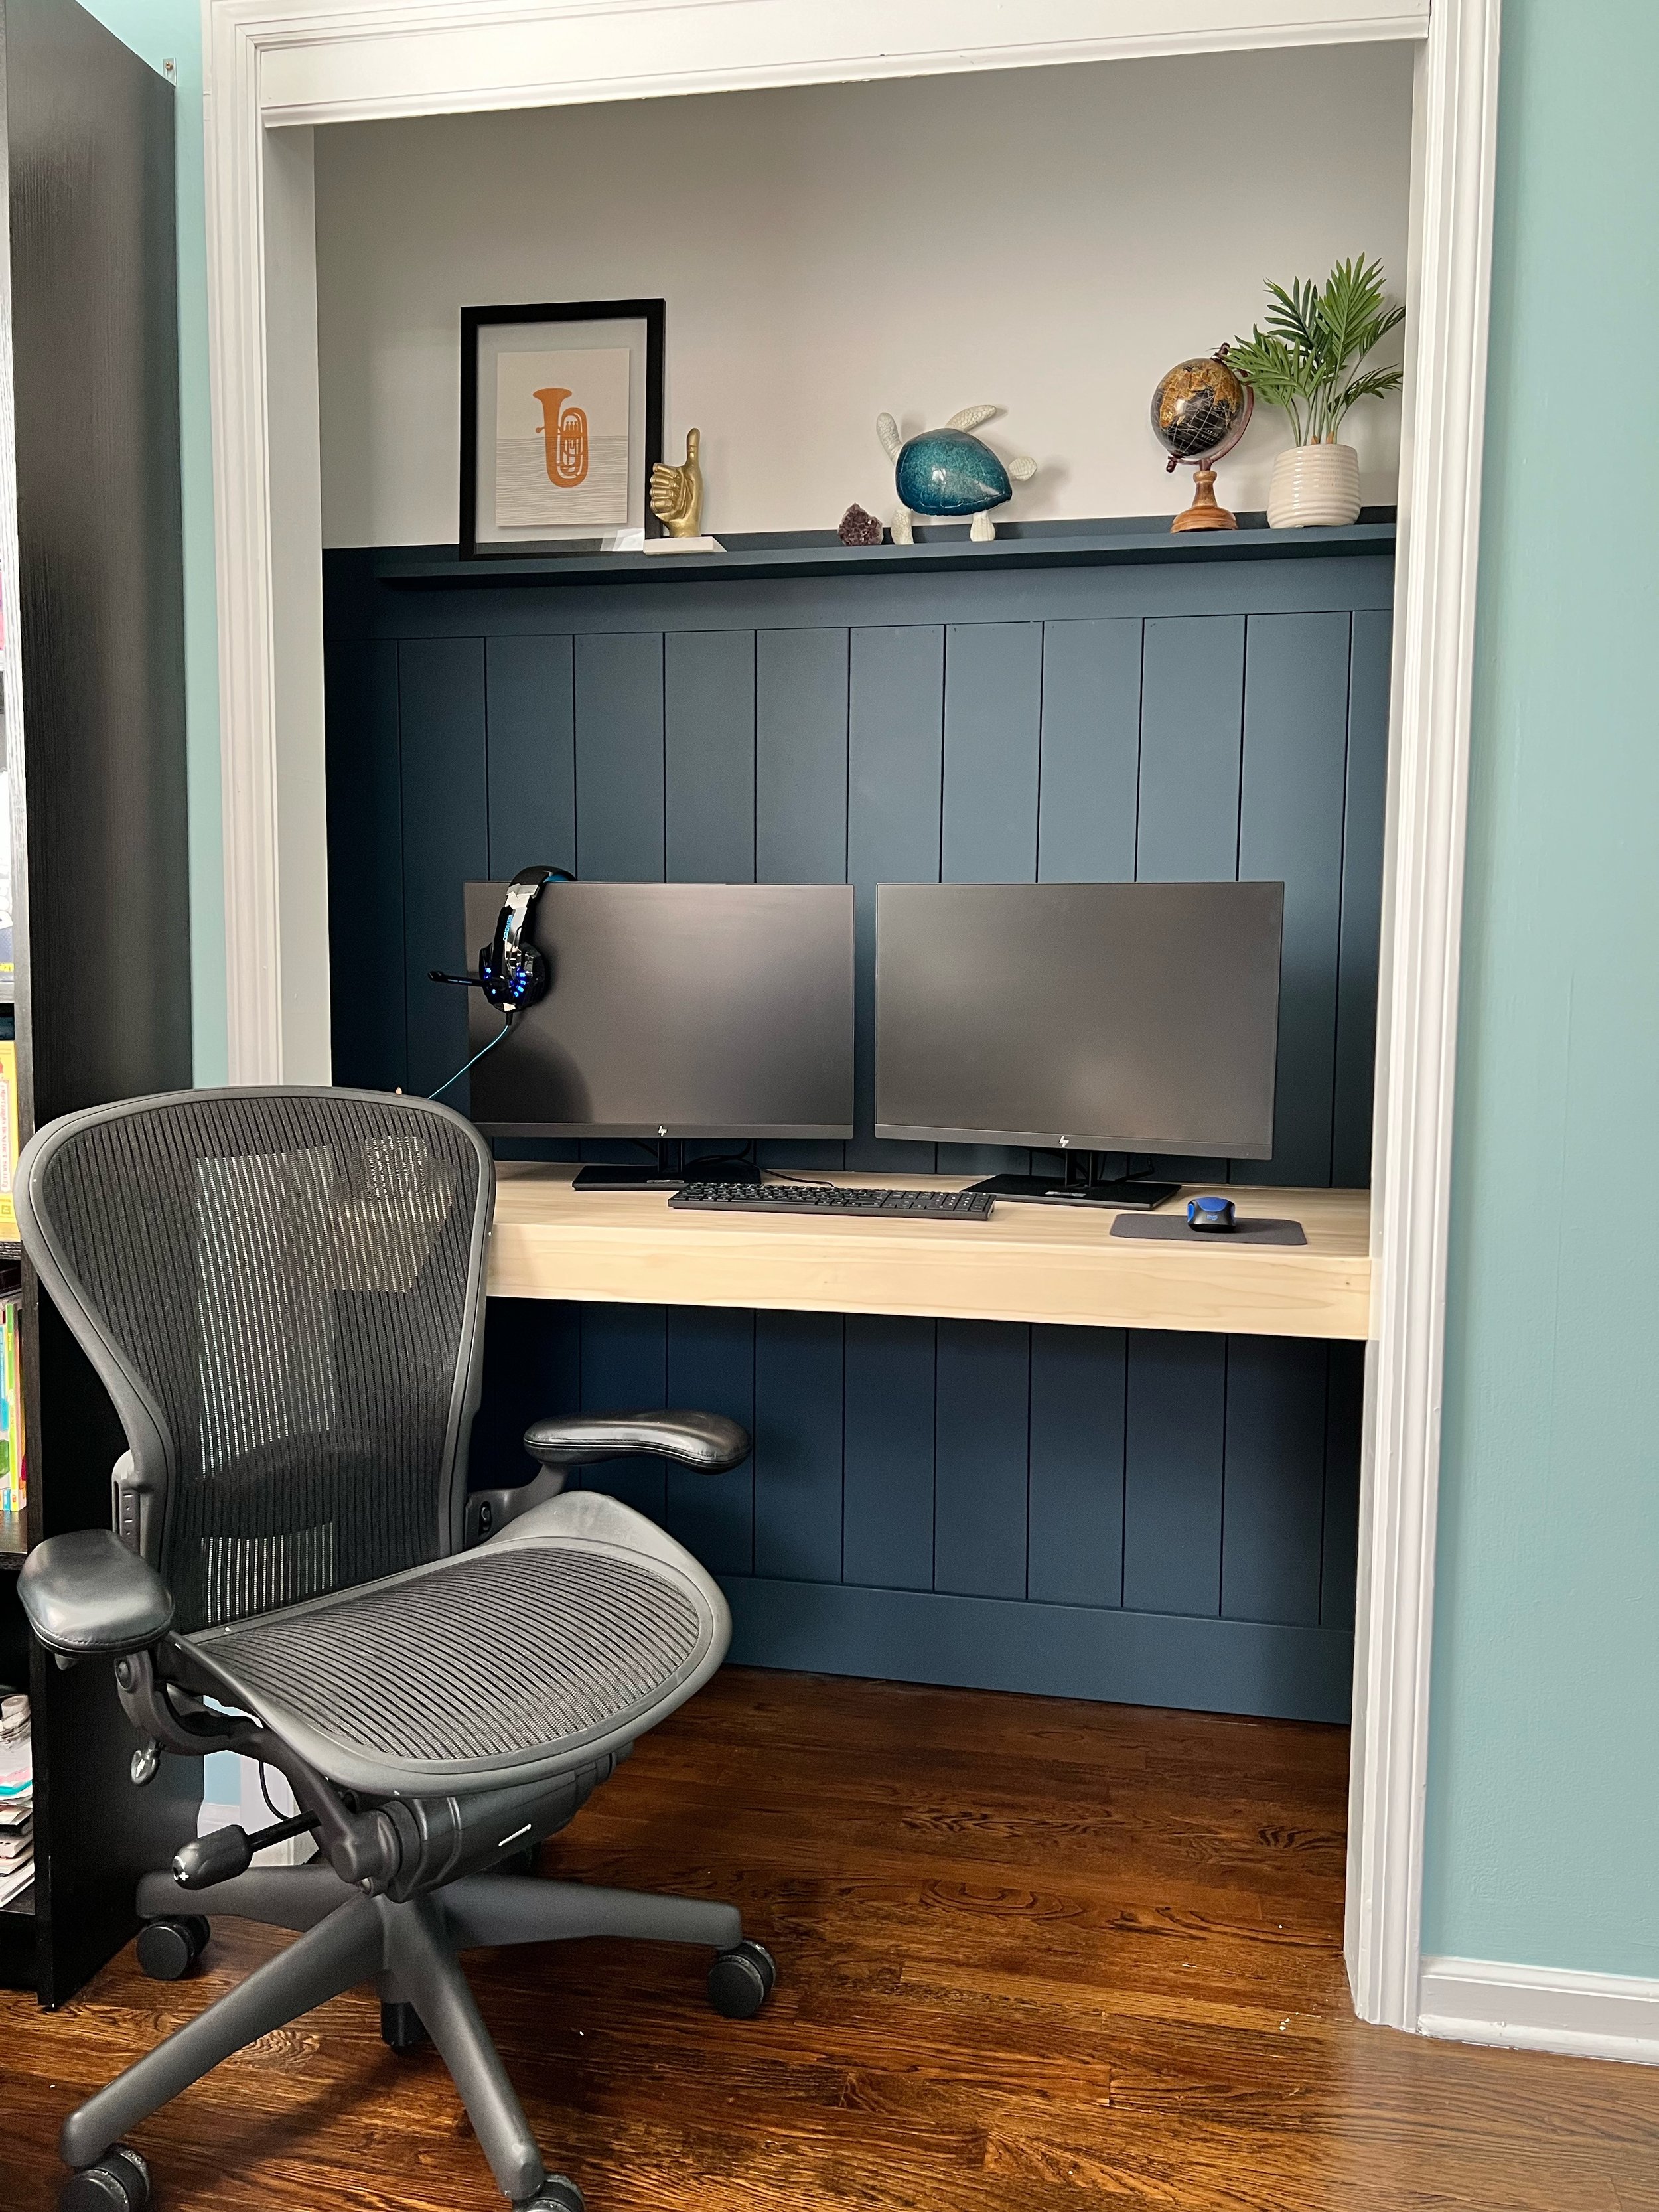
After

*Some of the links in this post are affiliate links, which means I may earn a small commission from qualifying purchases at no additional cost to you. I only recommend products I personally use and trust, or that I’ve thoroughly researched and recommend based on product reviews or brand reputation. Your support helps me continue creating helpful content for beginner DIYers. Thank you!
TOOLS:
Saw
Pencil
MATERIALS:
Wooden Closet Pole, cut to size
Begin by following the steps in the original tutorial, but skip step five.
Keep in mind these two key differences between the two builds:
I shortened the desktop width so that it didn’t run wall to wall, leaving space on each side for hanging clothes without them touching the desk.
I skipped the floating side shelves and instead installed closet rods running front to back on both sides of the closet.
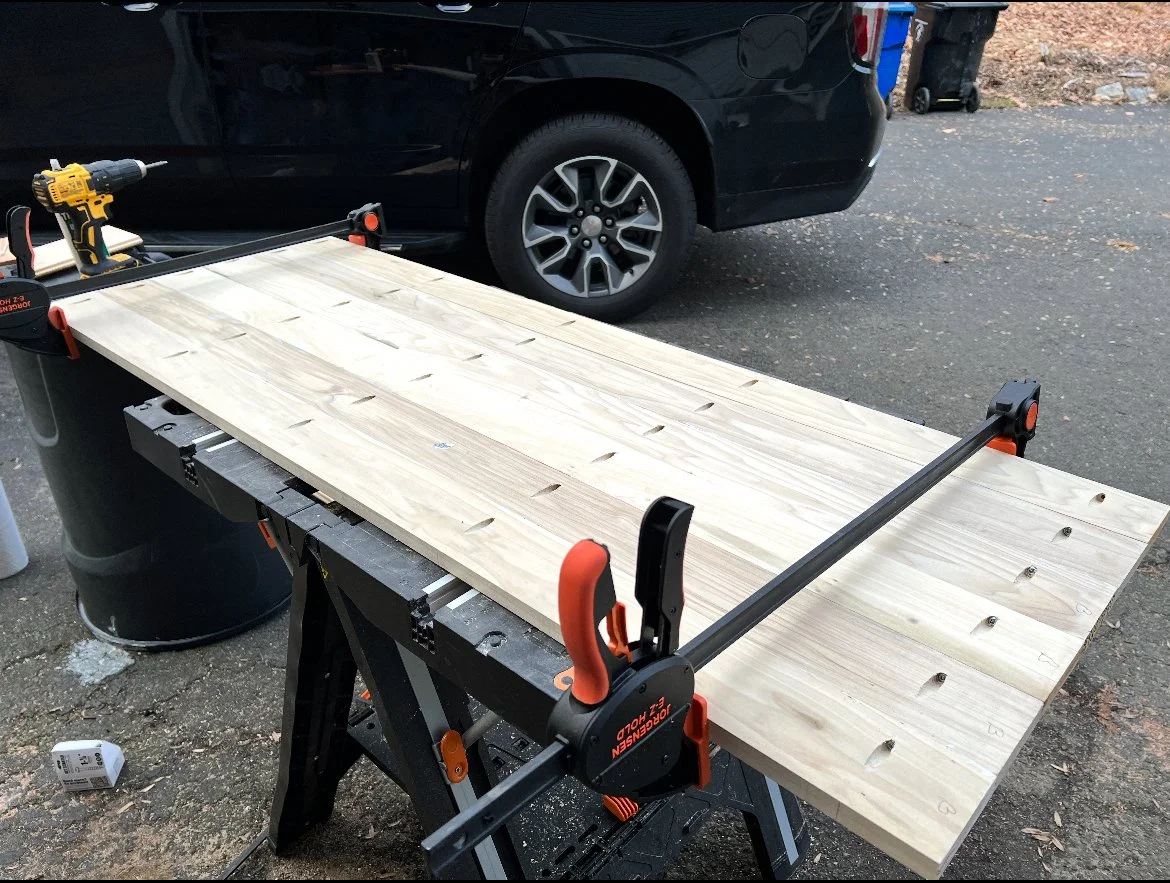
Desktop: Dimensions will vary based on your space but you want to leave enough room for clothing to hang on a hanger without the desktop being in the way. The hangers we use are 16.5” wide and I was able to add another inch or so for a little extra space. You’ll also want to make sure there’s enough space for your desktop to run wider than the opening of the closet so that it will have part of the wall at the front of the closet to rest on cleats. In some cases you don’t need a cleat on a front wall but since the sides of the desktop in this scenario will be free floating, the front cleats are definitely needed.

Continue following the steps in the original tutorial, skipping step five.
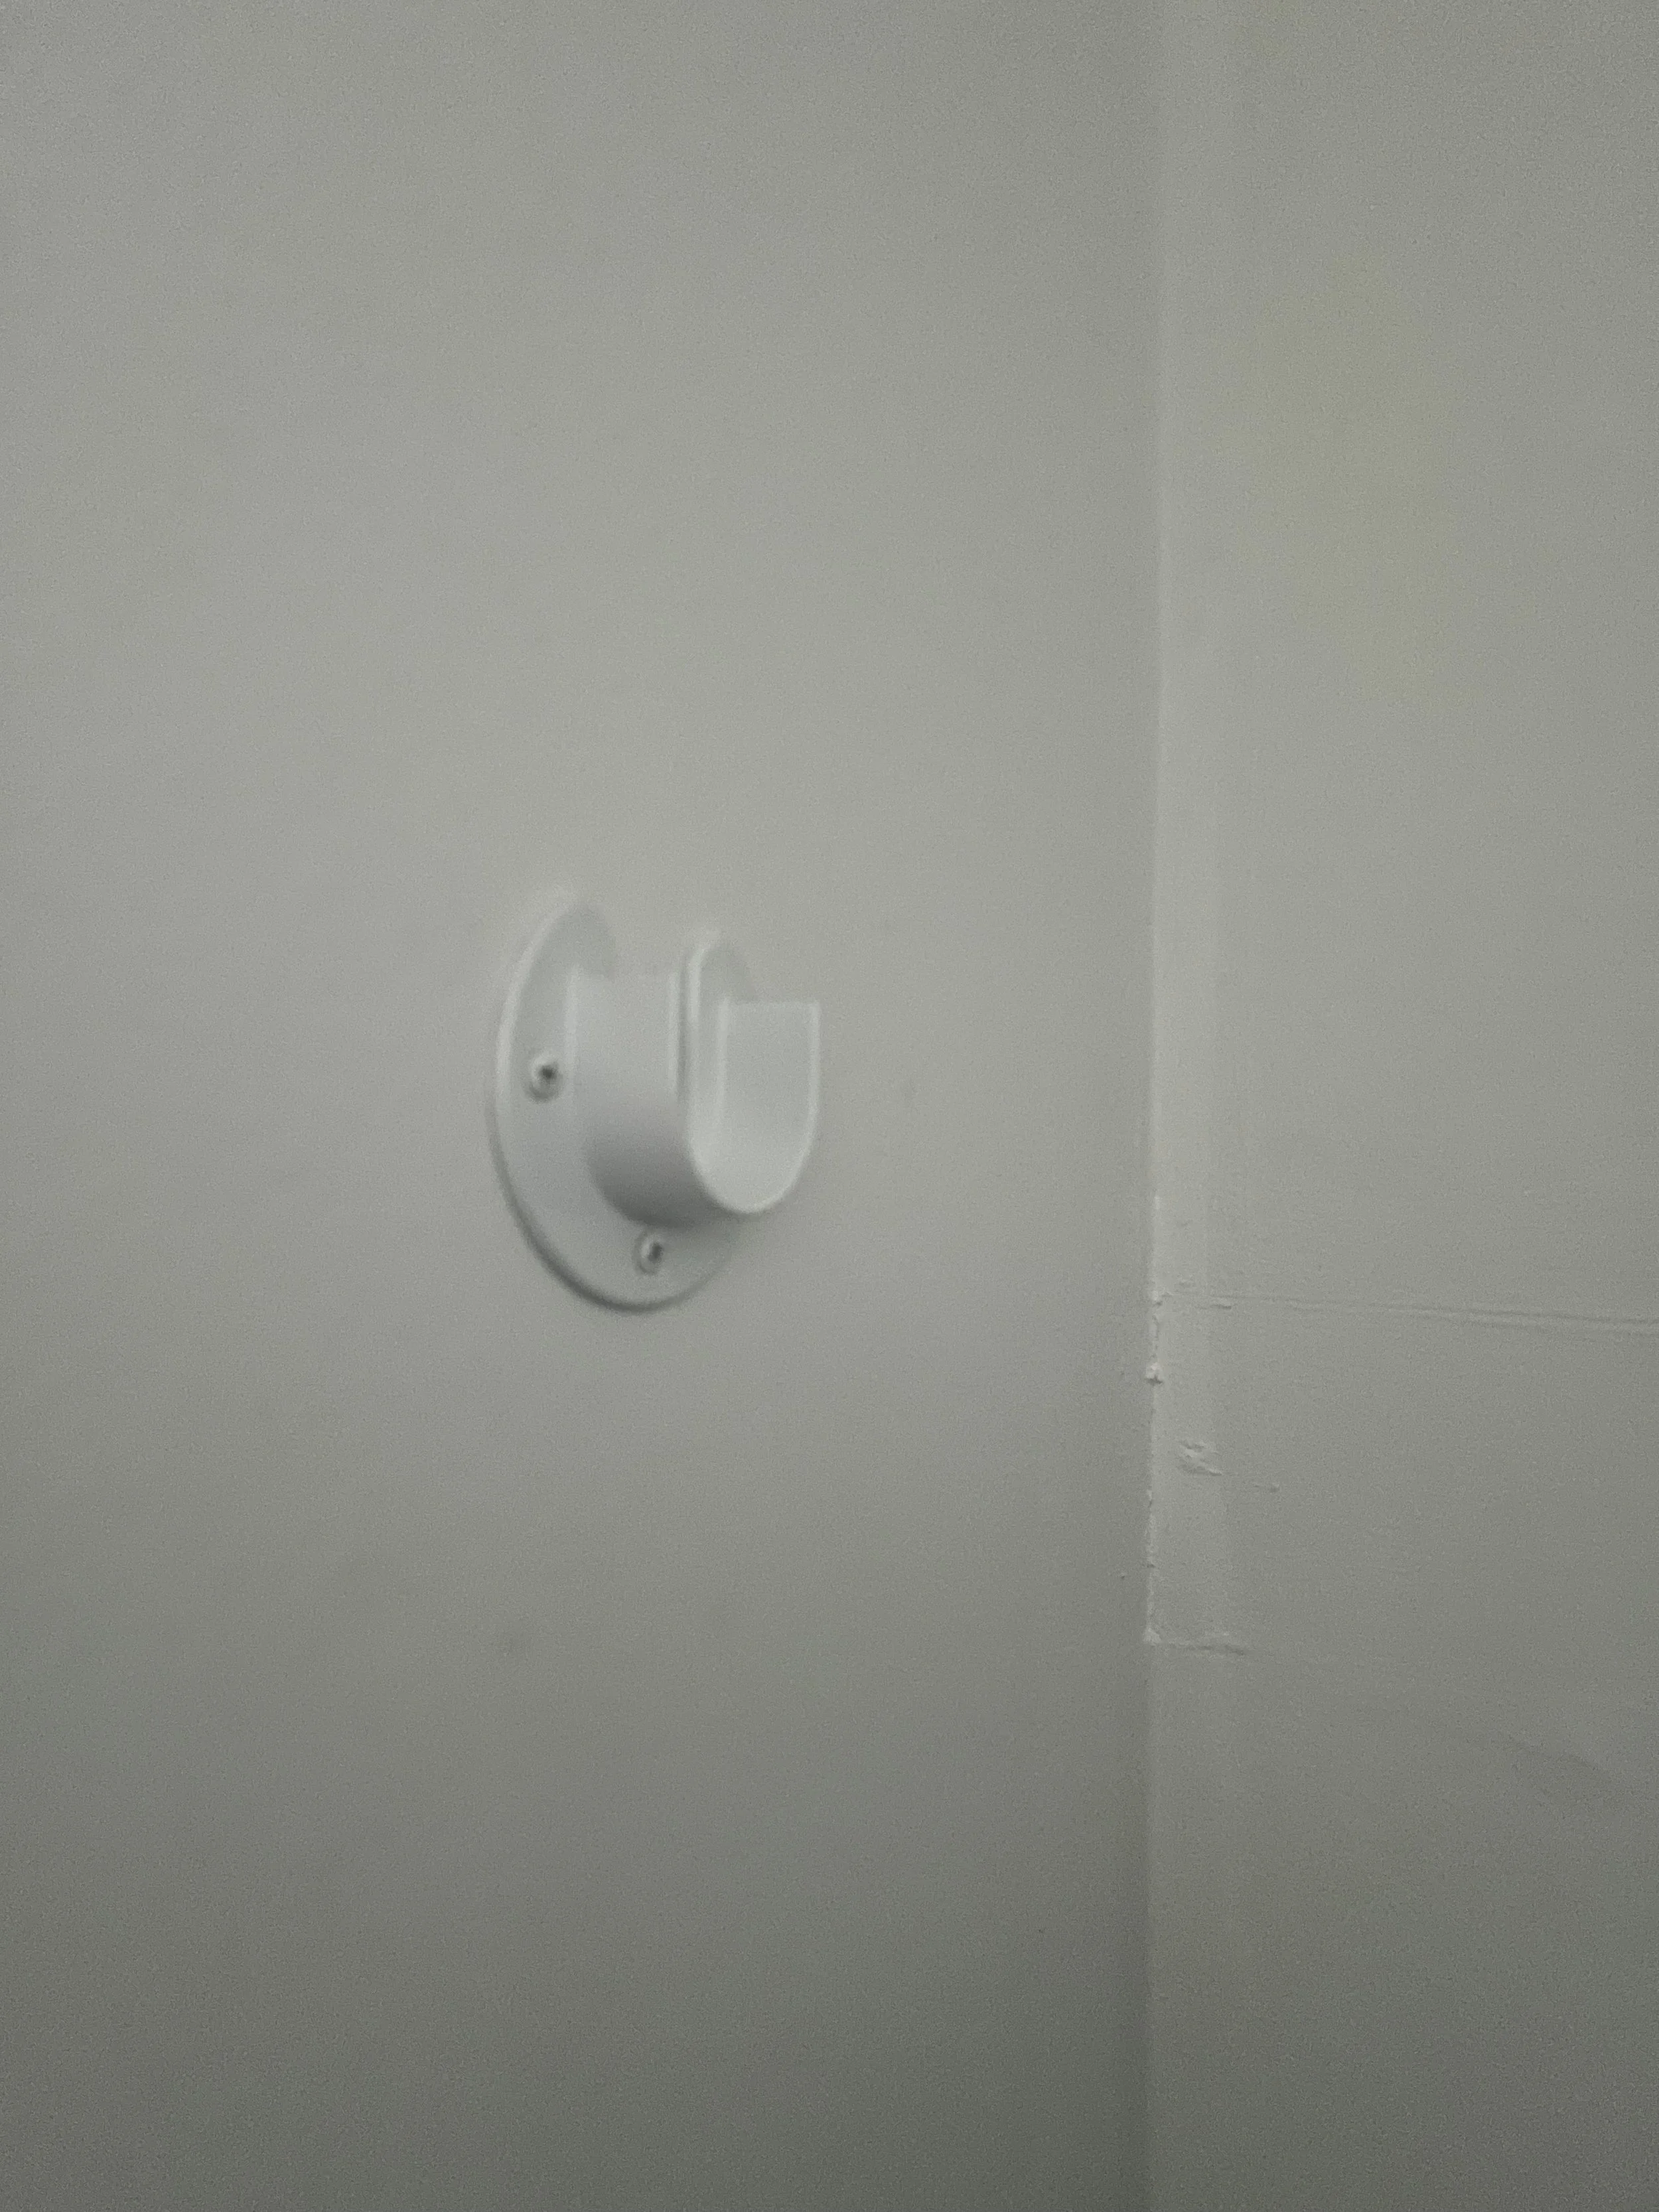
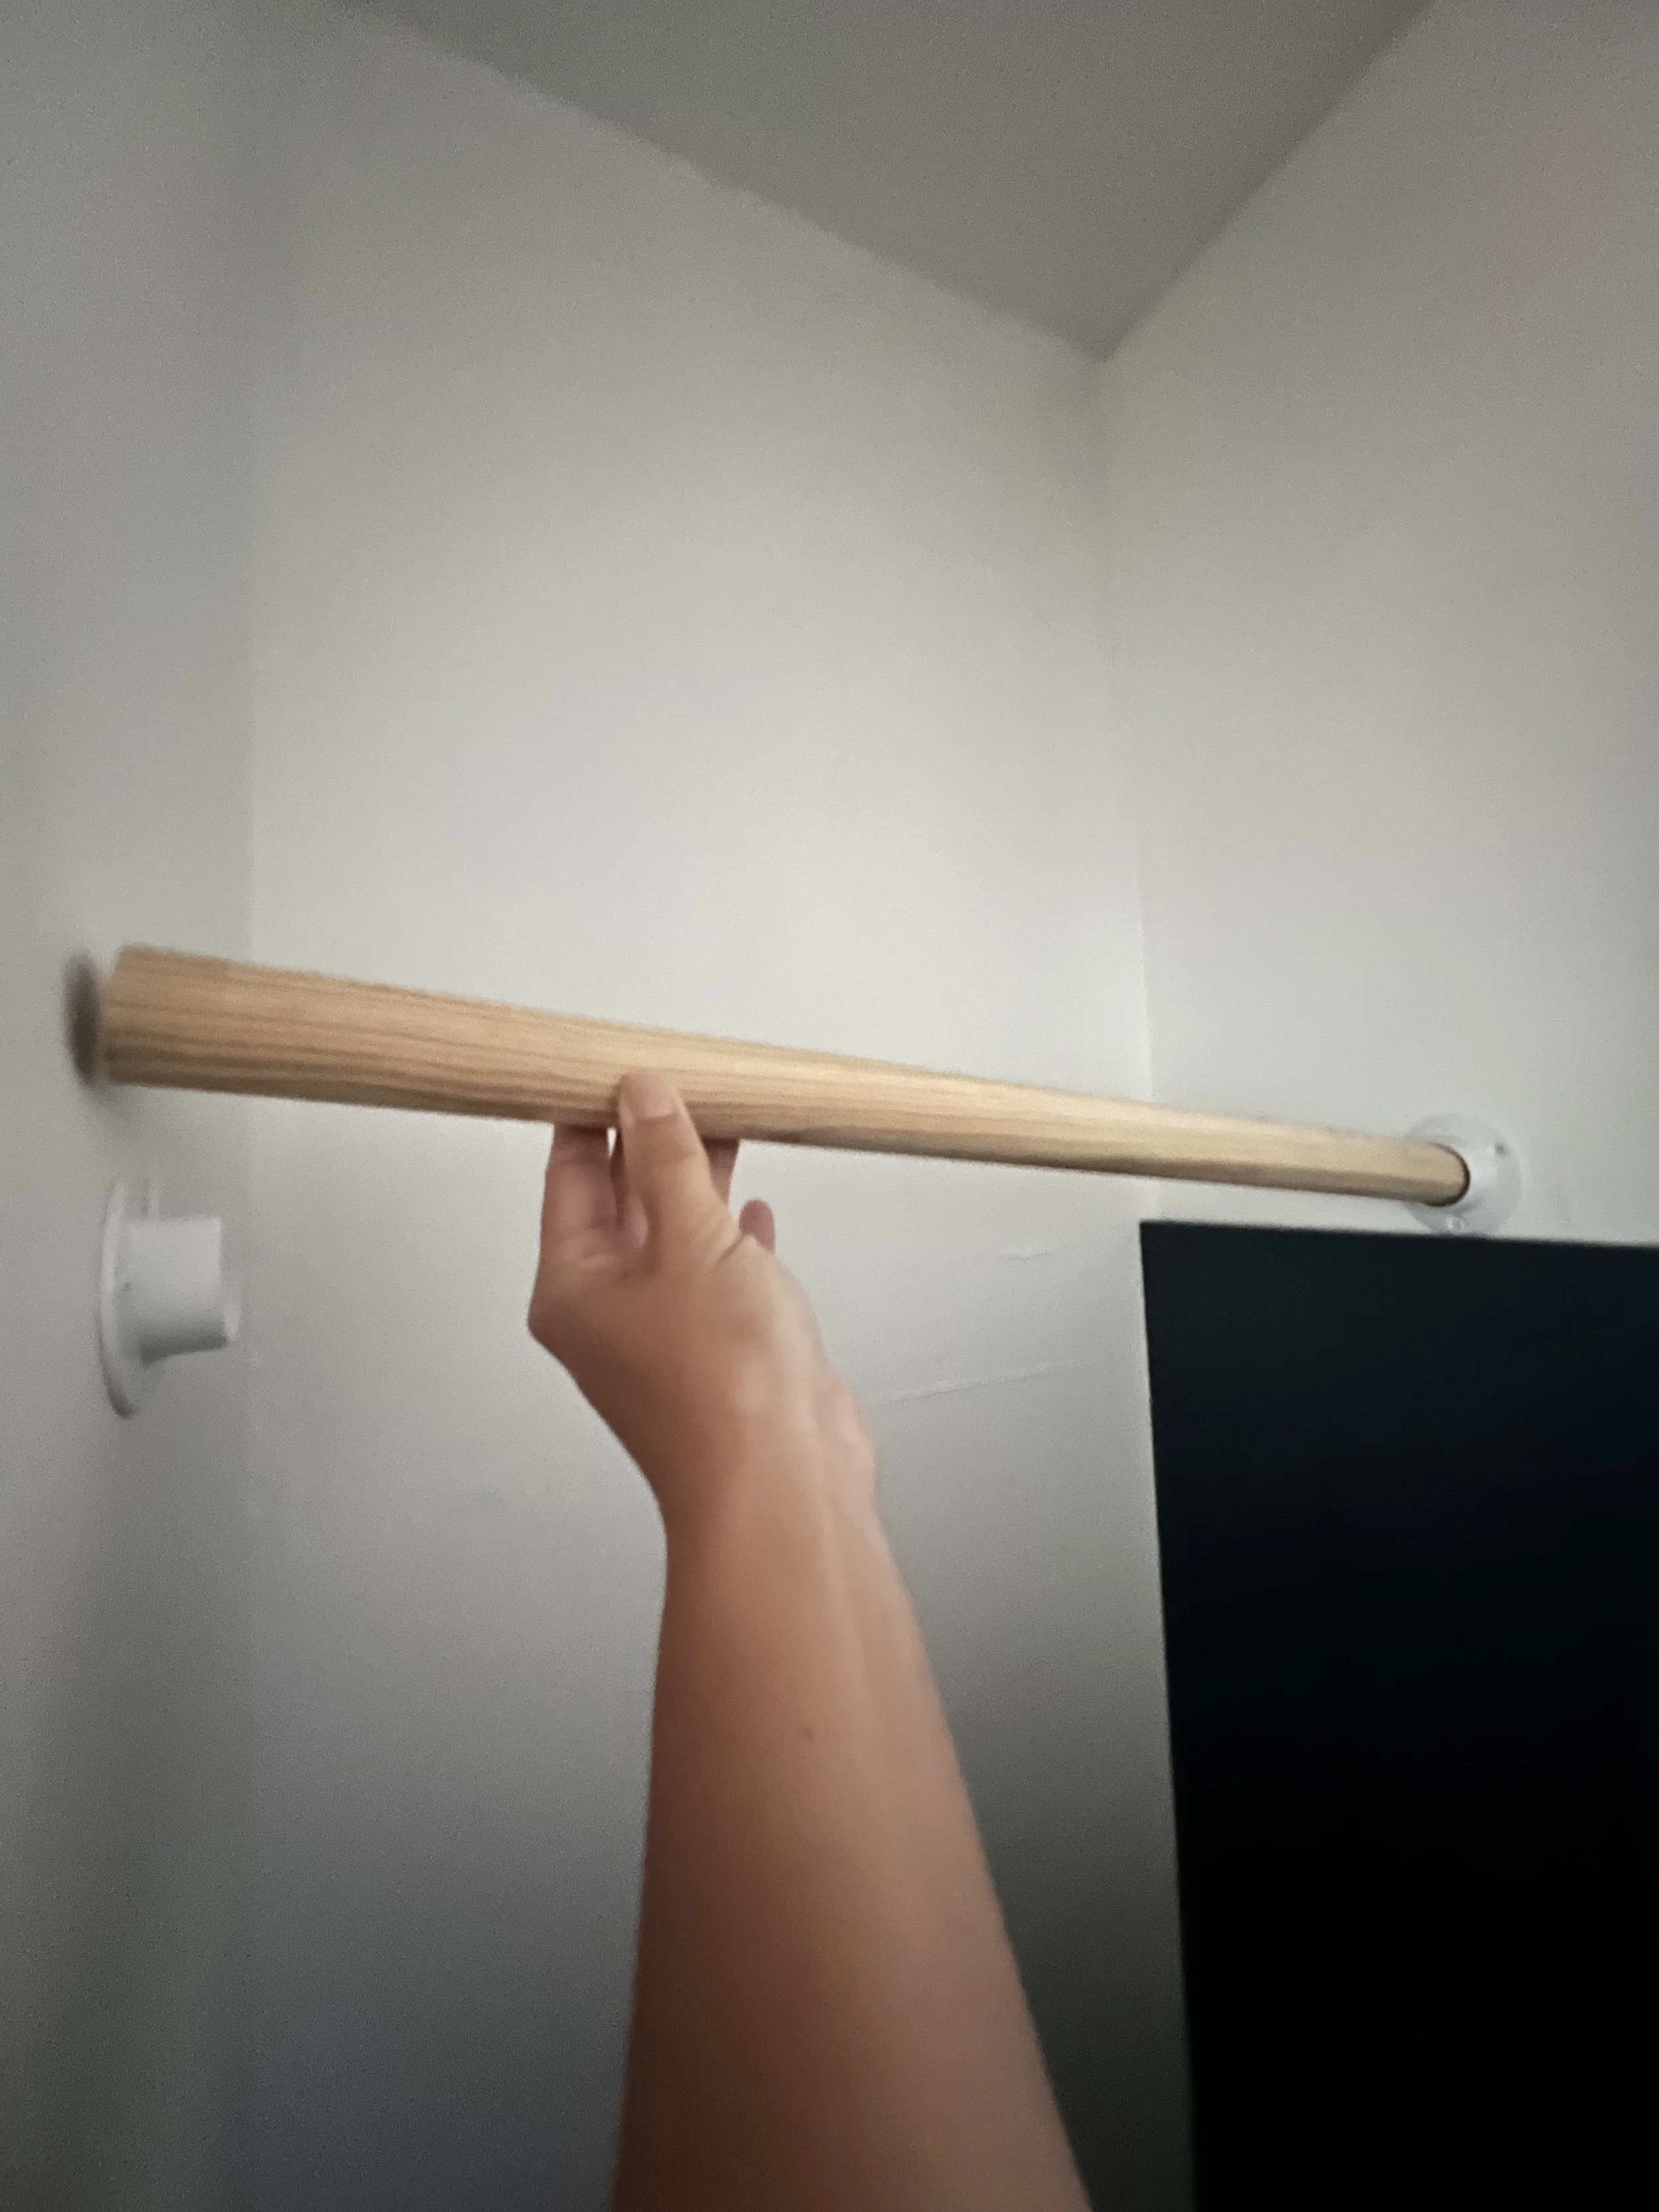
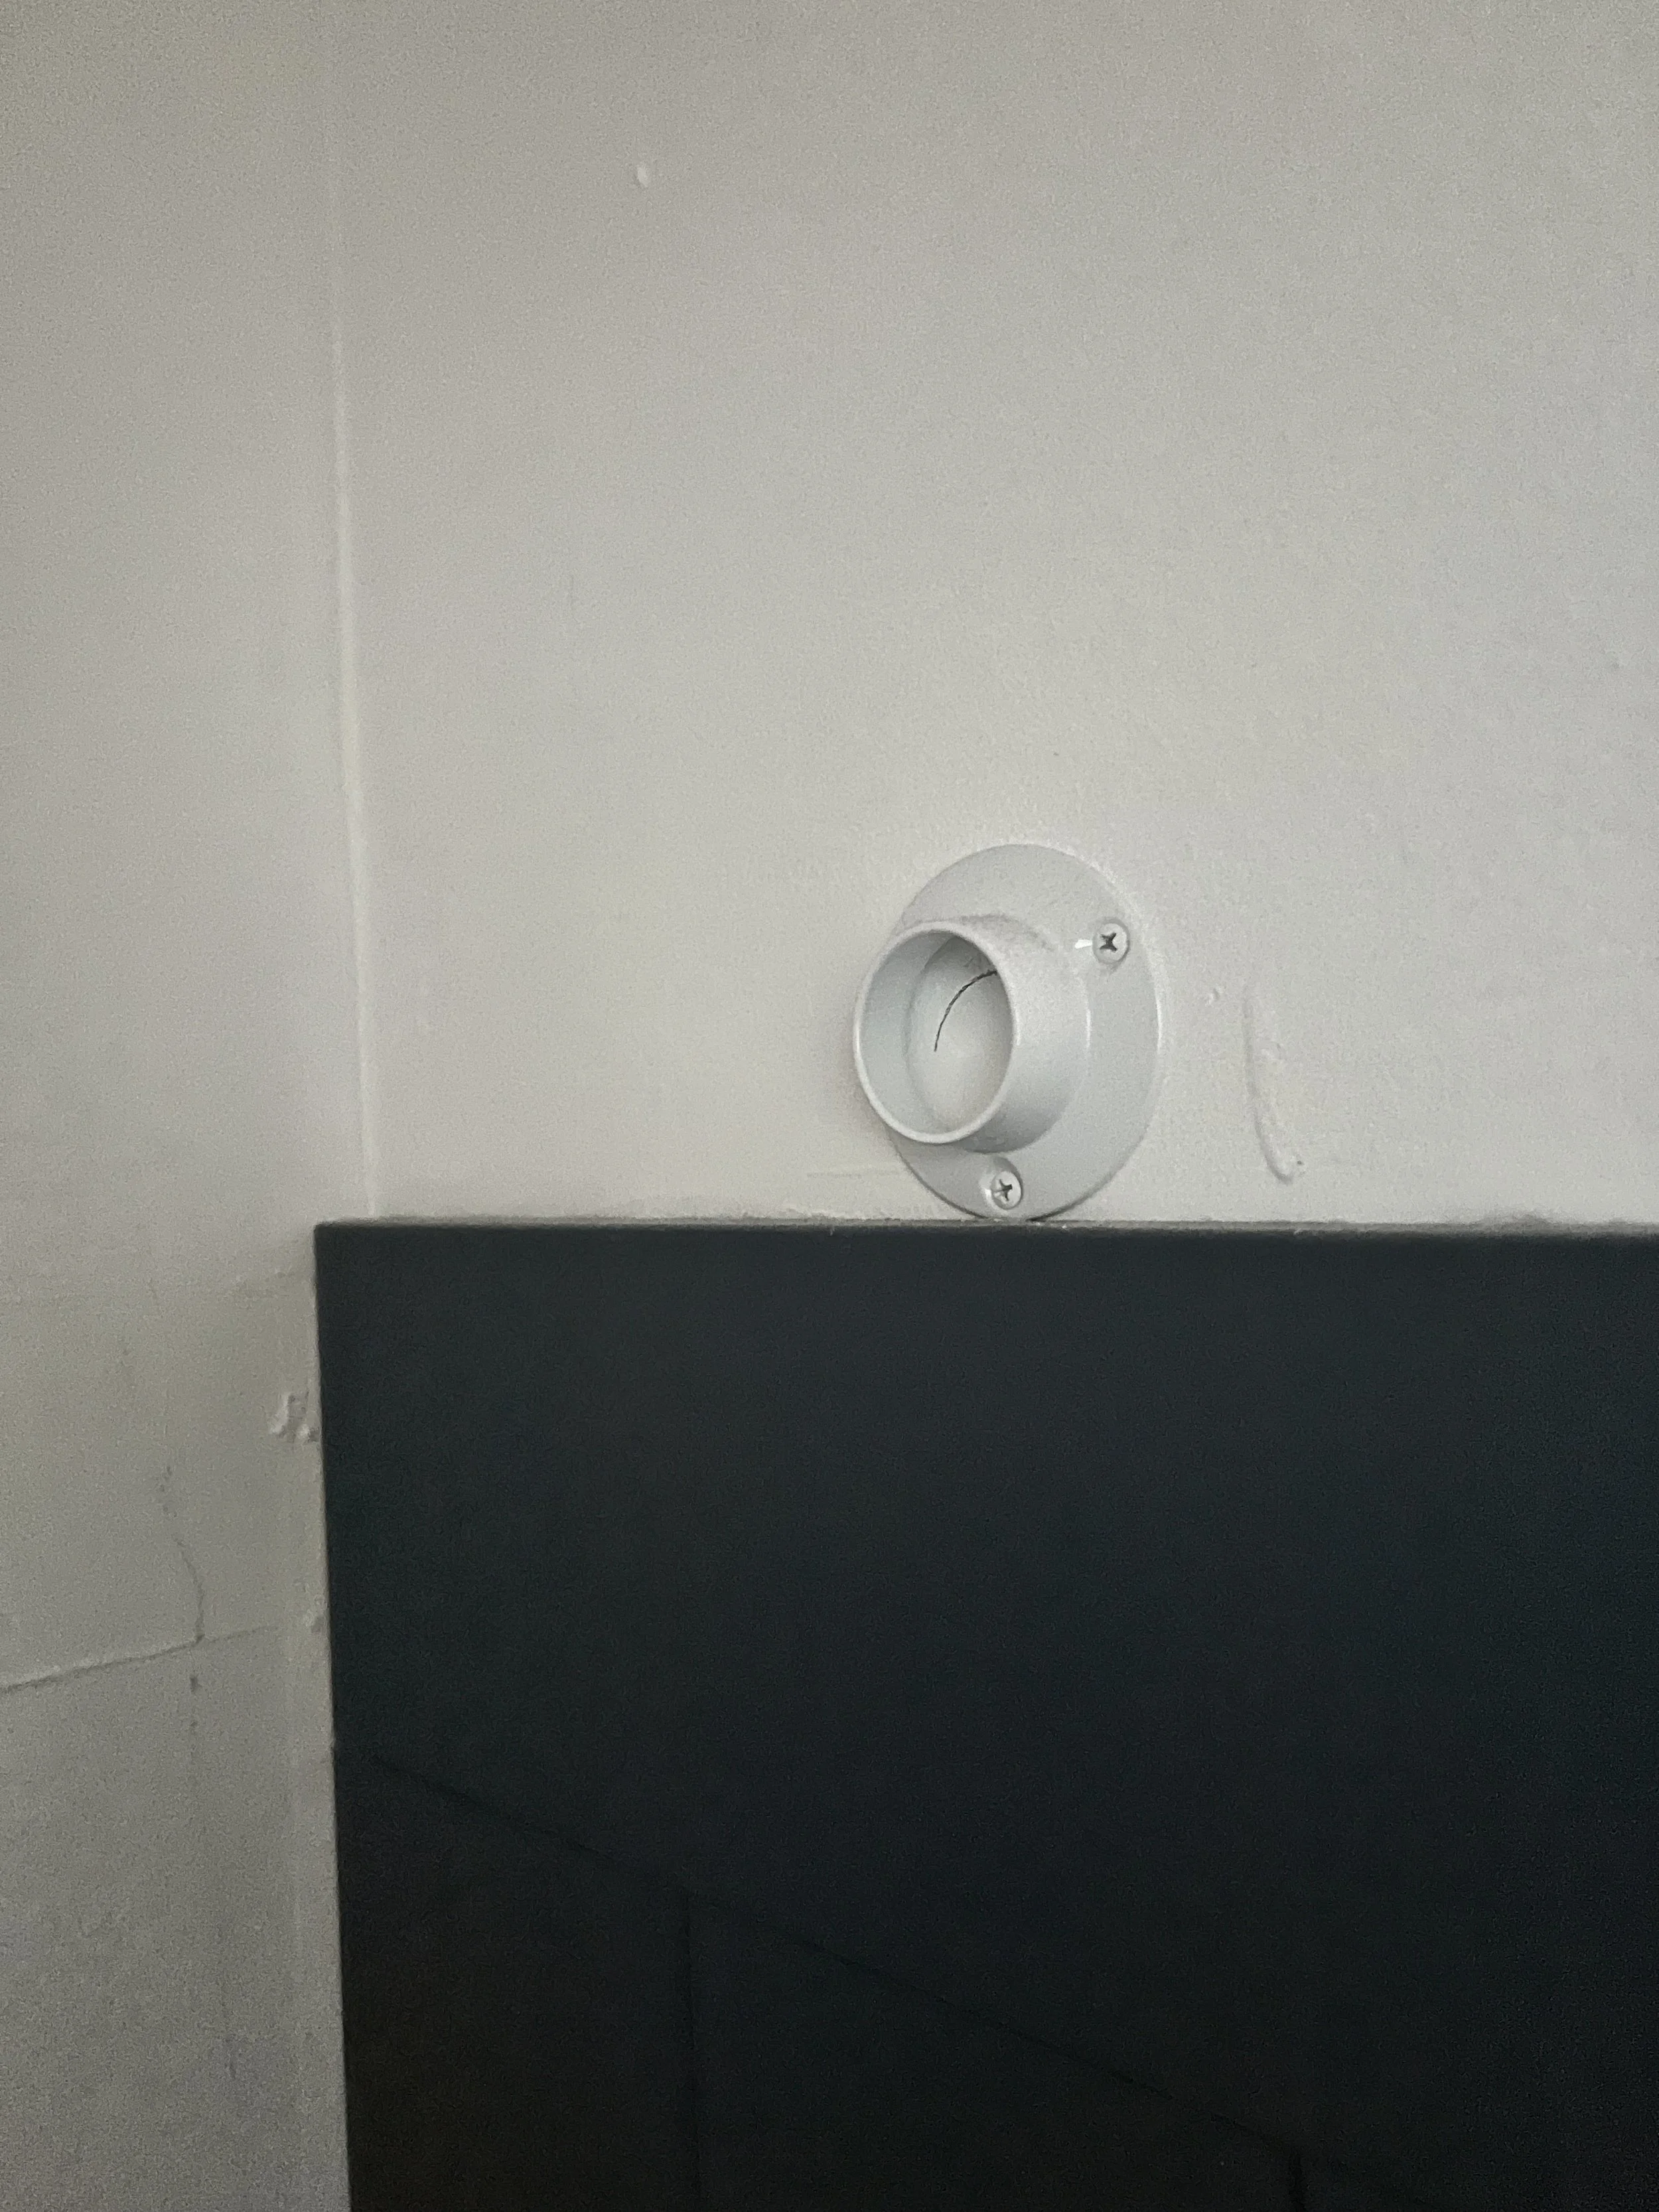
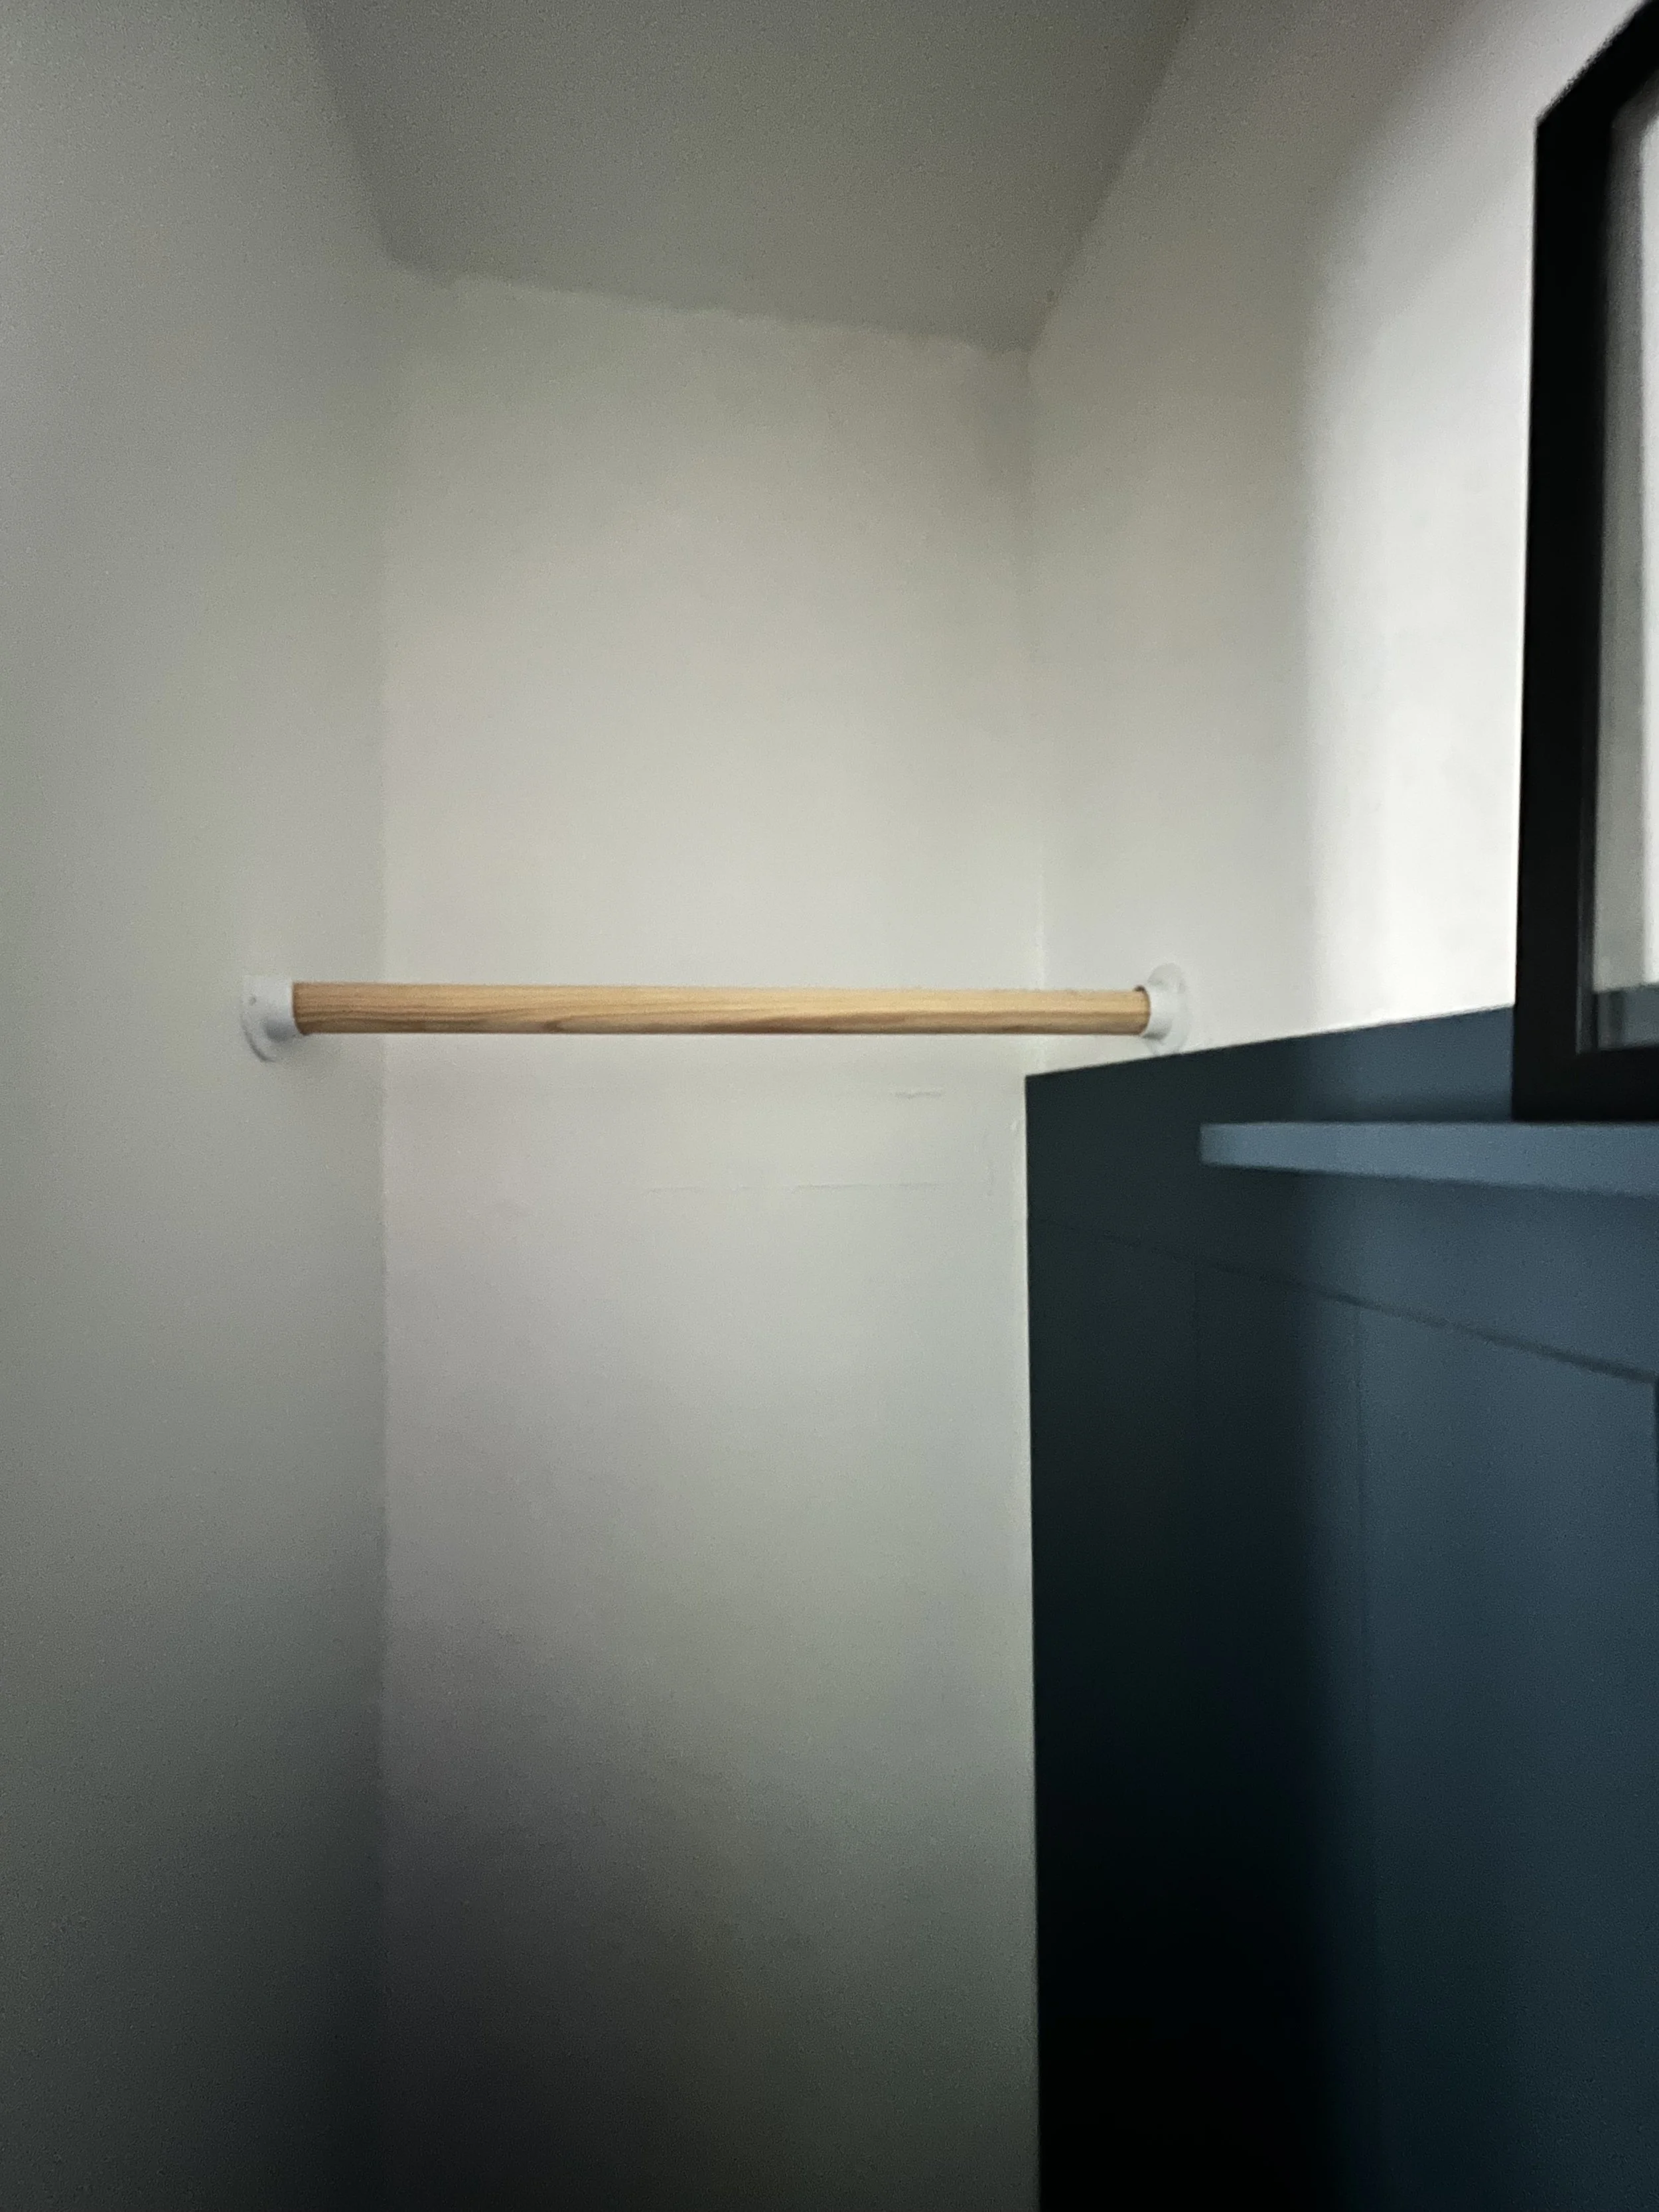
When you're ready to install the closet poles, measure and mark where each end will attach to the wall, using the closet pole brackets to mark the screw locations. Position the pole so that hangers fit comfortably without rubbing or scratching against the wall. If you have flexibility in where you mount the brackets, try to align them with wall studs- use a stud finder to locate them. If a bracket must be placed where there’s no stud, drill a pilot hole and insert a wall anchor before attaching the bracket to ensure it can support the weight of the pole and clothing.
Measure the distance between brackets and cut your pole to size if it doesn’t already fit. Leave about 1/8" of wiggle room so it’s easy to slide in and out. Slide one end of the pole into the capped bracket first, then lower the other end into the open side.
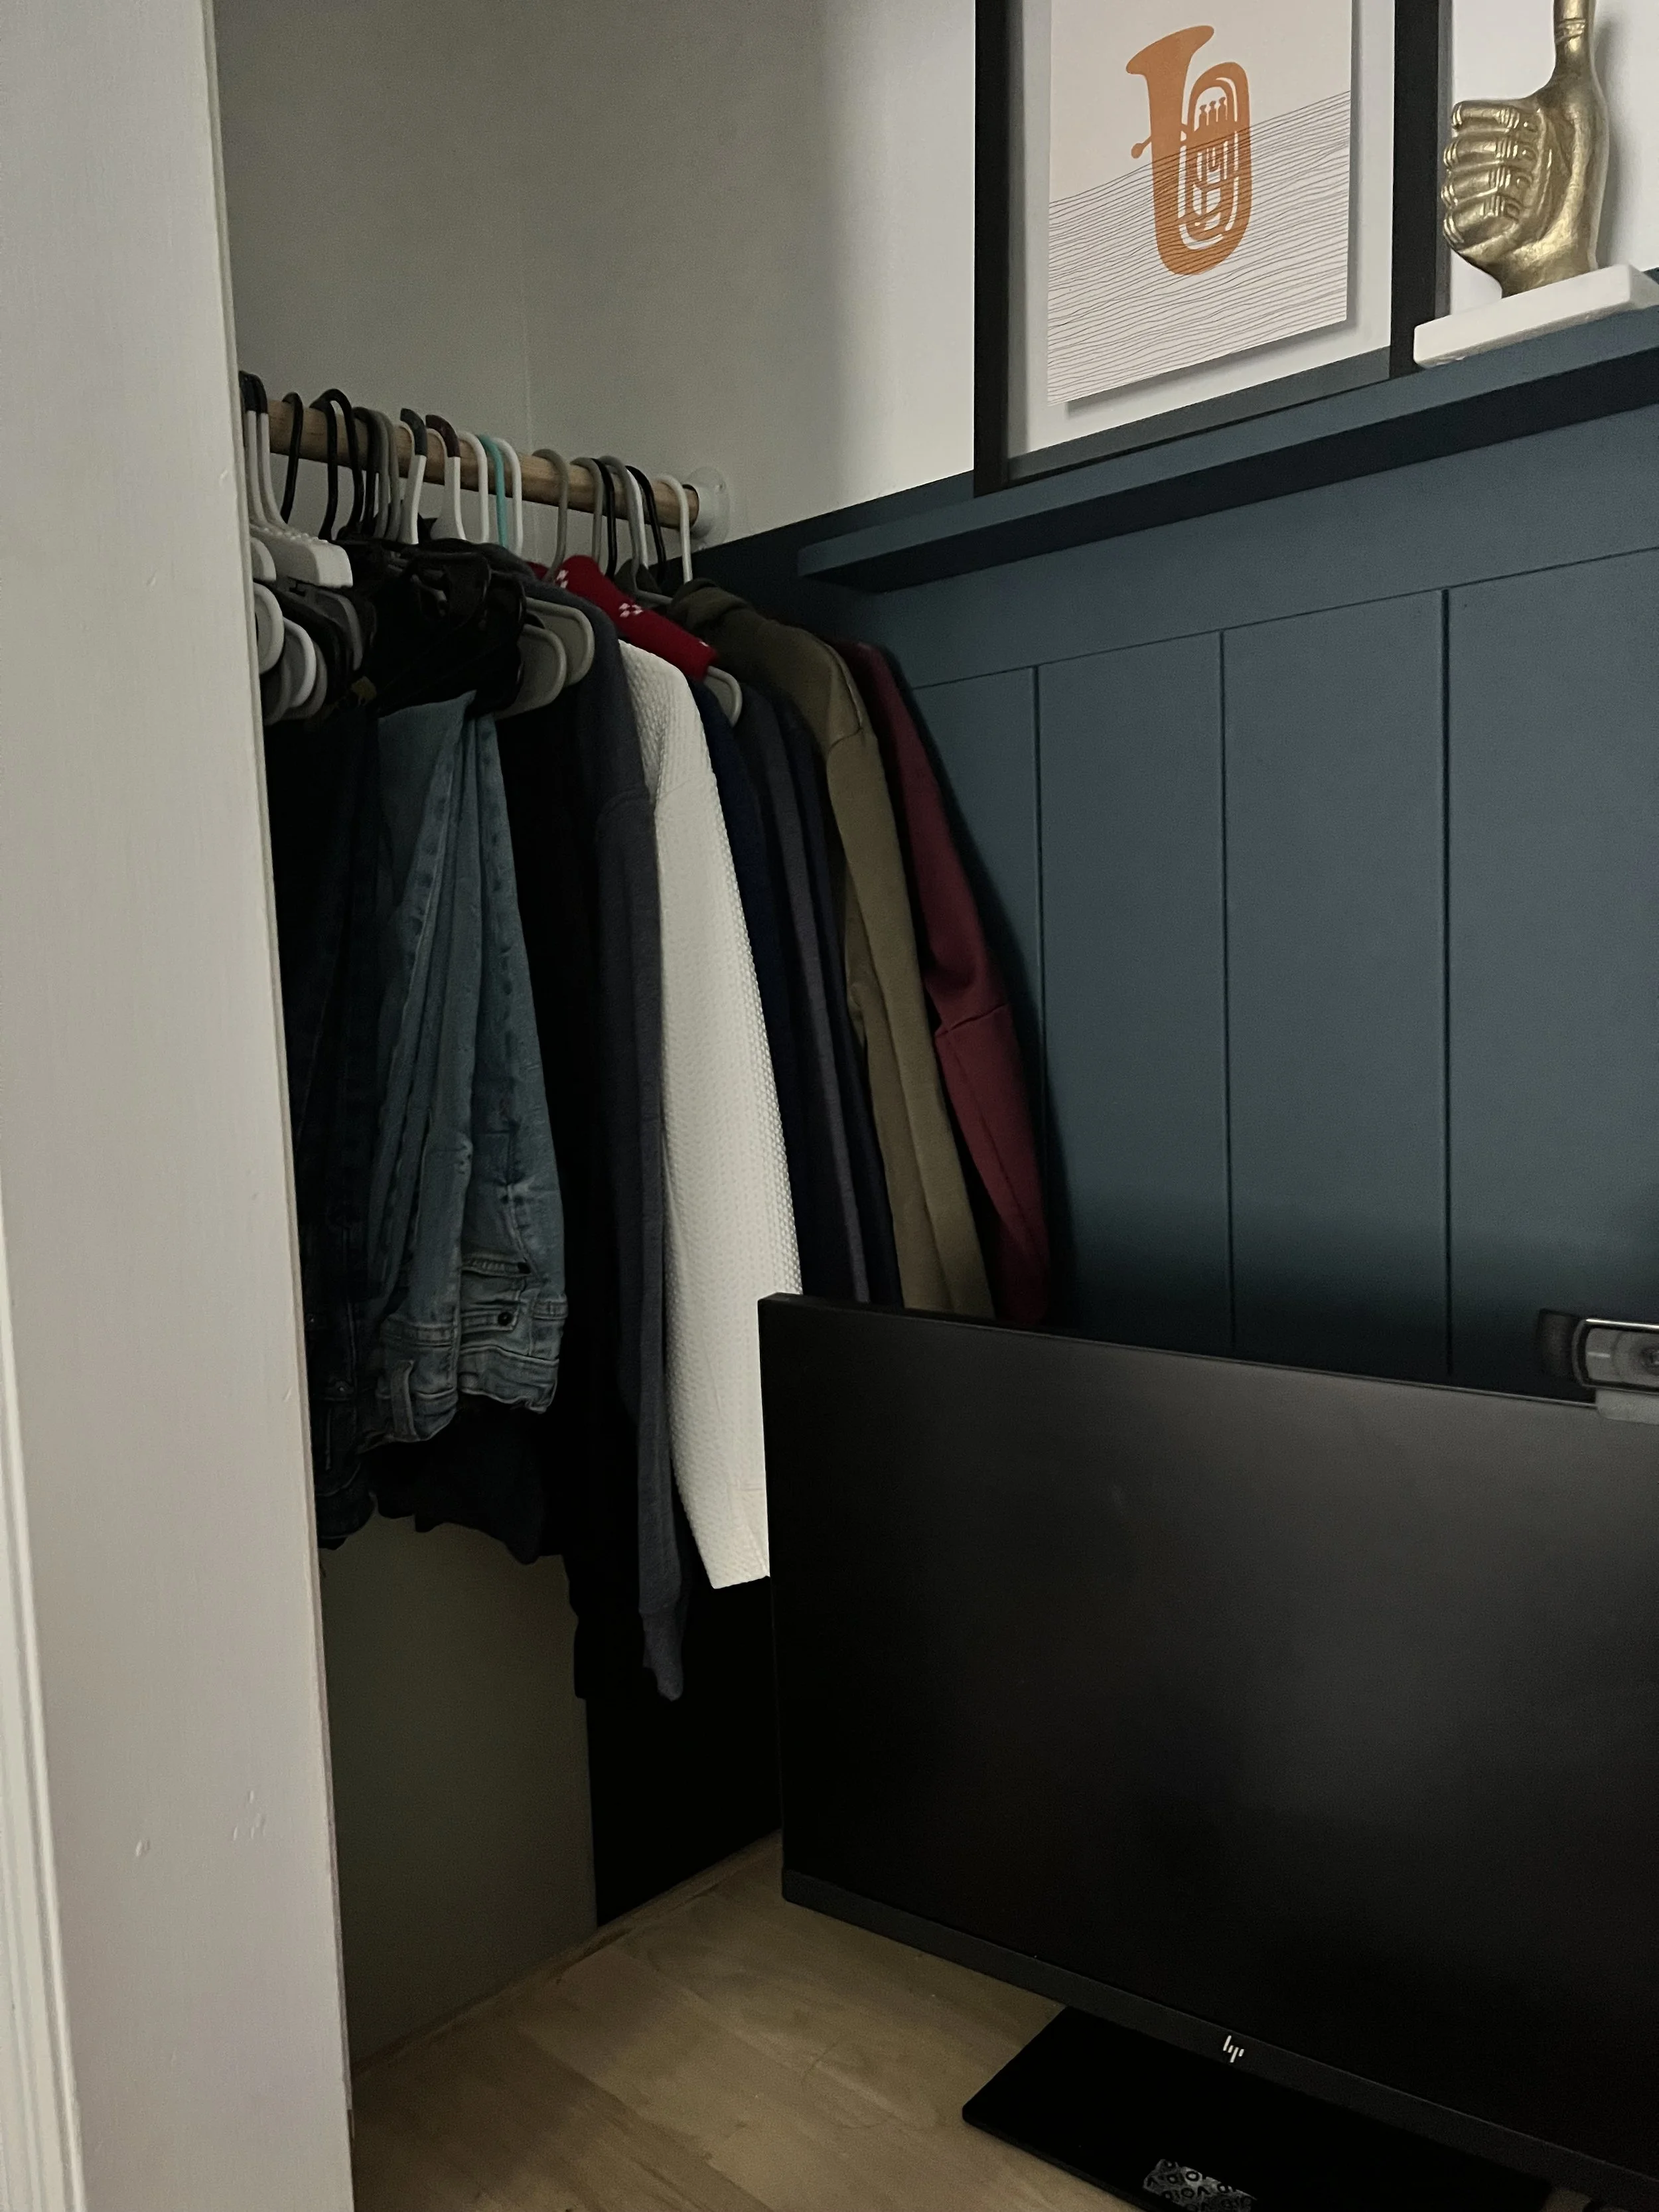
And that’s it! Once your closet pole is in place, you’re ready to start hanging things up and enjoying your freshly organized space.
Share Your Project!
If you recreated this look or were inspired by this build, I’d love to see it!
Tag me @ProjectObsessedDIY on Instagram so I can cheer you on. 🛠️✨
Thanks for following along!