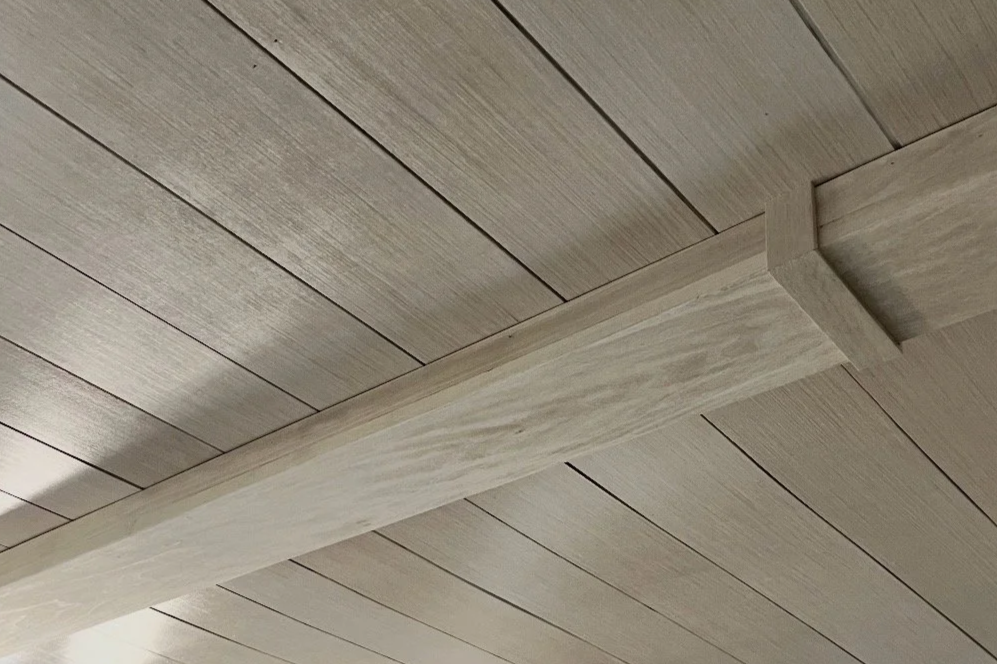
How to Create & Install a
Budget-Friendly Wood Plank Ceiling (Solo!)
Budget-Friendly. Beginner-Friendly(ish). No extra hands required.
Learn how I saved hundreds by making lightweight wood planks from plywood,
and how you can install this ceiling yourself, even if you’re working on your own.
First, I’d like to address: Why Beginner-Friendly “ish”?
While I love focusing on beginner-friendly projects here, there's a pretty wide range of what "beginner-friendly" can mean.
I wouldn't recommend this as your very first project if you've never picked up a power tool before. But if you're comfortable with the basics (or you're ready to challenge yourself and learn something new) you might be surprised by how doable this project really is. None of the individual steps are super difficult; there are just a lot of them. The key is breaking the project down into manageable steps and tackling them one at a time.
Another reason this project can stretch a bit beyond “beginner” is because every home is a little different. Along the way, you may run into an unexpected obstacle, make a mistake that needs fixing, or discover you need a tool you hadn't planned on. But keep in mind that's completely normal. In fact, that's a big part of DIY. Learning how to adapt and problem-solve is what builds your skills and confidence for the next project.
If you've been eyeing up a project like this and have been second guessing yourself, I hope this tutorial changes your mind. Take your time, trust the process, and remember: every experienced DIYer was a beginner once.

Tools:
Circular Saw
Rip-Cut Circular Saw Guide (optional but recommended)
*Table saw can be used instead of circular saw and guide but only if you have experience using it. I don’t recommend a table saw as a beginner tool.
Miter Saw
Jigsaw
Drill
Brad Nailer
Caulk gun
Miter Shears (optional, can use miter saw)
Electric sander
Tape measure and/or Laser tape measure
Clamps
Contour Gauge
Hammer
*Some of the links in this post are affiliate links, which means I may earn a small commission from qualifying purchases at no additional cost to you. I only recommend products I personally use and trust, or that I’ve thoroughly researched and recommend based on product reviews or brand reputation. Your support helps me continue creating helpful content for beginner DIYers. Thank you!
Materials:
Plywood- 5mm x 4ft x 8ft (I used 6 sheets for my space)
Sandpaper
Stain (I used Minwax Simply White)
Staining pads
Staining rags
Polycrylic clear stain (enough for both sides to prevent warping)
Paint brushes or 4'“ rollers
Brad nails
Wood Glue
Trim/crown molding type material (I used this)
liquid nails
caulk
wood filler
Spacer for consistent spacing between planks- you don’t need a special product for this. You can use anything that is the width you want- thin piece of wood, ruler, etc
Beam materials (if you’ll have a beam. Size varies based on preferred beam size):
2x?? basic pine boards for mounting cleat. Width depends on how wide you want your beam overall. Length can be somewhat shorter than overall length of beam and can be broken up into smaller pieces- see notes. I used multiple 2×4 scrap wood I had lying around.
1×2 poplar boards, length is 2x beam length
1×6 poplar board, length of full beam
1/4'“ x 2” poplar or decorative trim over seams, optional
Our Services
Explore our range of services designed to help you move forward with confidence, wherever you're headed next.
Meet the Team
-
![]()
Monet Goode
FOUNDER
With a vision for building something meaningful, our founder brings a blend of big-picture thinking and hands-on experience.
They set the tone for everything we do. -
![]()
Emmett Marsh
SALES MANAGER
Focused, approachable, and driven by results, our sales manager is all about building strong relationships. They help connect people to the right solutions—with clarity and care. -
![]()
Eleanor Parks
MARKETING DIRECTOR
Creative and strategic in equal measure, our marketing director brings fresh ideas to every campaign. They turn insights into action and help our message resonate with the right audience. -
![]()
Karl Holland
CUSTOMER SERVICE MANAGER
Friendly, attentive, and always ready to help, our customer service manager ensures every interaction is a positive one. They keep communication clear, timely, and human.


